ProcessView Standard and Professional users can create custom user properties to capture supplemental activity data. ProcessView supports four kinds of custom user properties: Time-Based, Quantity-Based, Assigned Cost, and Boolean.
Time-based user properties are used to capture data measured in seconds, minutes, hours, work periods, days or weeks.
EXAMPLES:
• Delay Time
• Patient Time
• Transportation Time
Quantity-based user properties are used to capture data with a unit of measure other than time.
EXAMPLES:
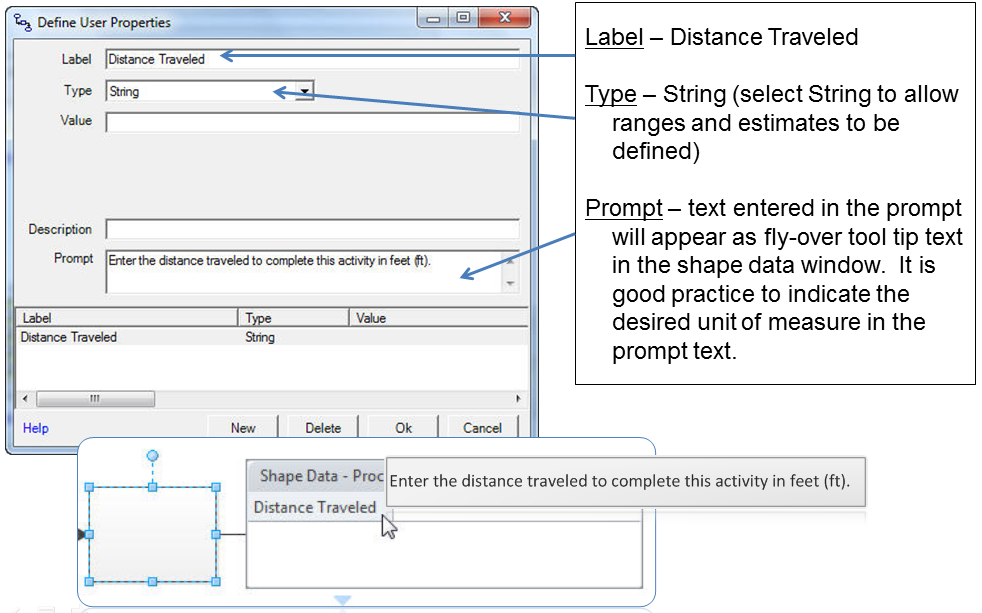
• Distance Traveled
• Number of Moves
• Number of Touches
Assigned Cost user properties are used to represent a fixed cost that is incurred each time an activity is performed.
EXAMPLES:
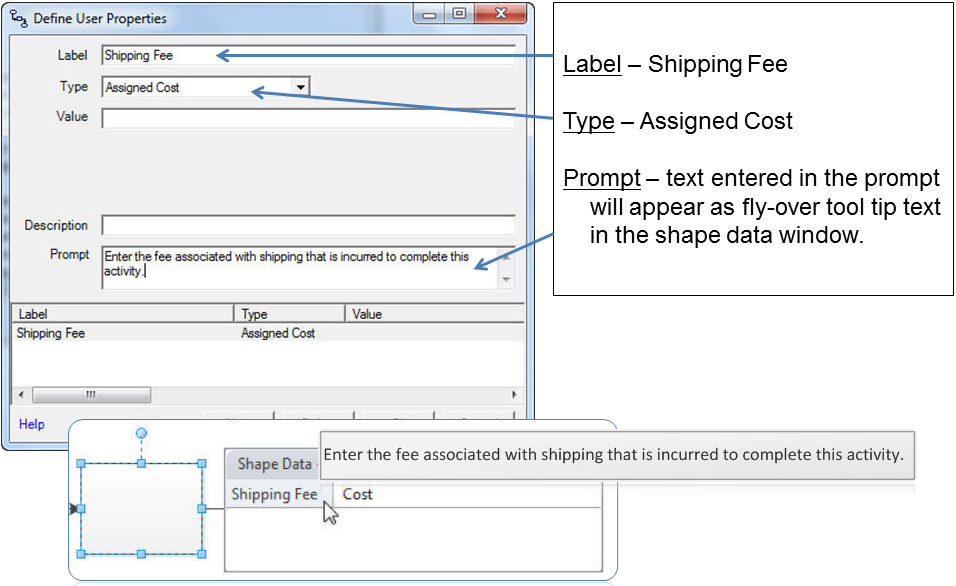
• Shipping Fee
• Processing Fee
• Courier Fee
Boolean user properties are typically used to describe the presence or absence of some property.
EXAMPLES:
• Transportation Required
• Benchmark Activity
• Safety Equipment Needed
To define a custom user property in ProcessView version 2.0, select the Define Attributes button on the ProcessView toolbar and choose the 'Custom' option.
If working in ProcessView version 1.0, select the Add/Update Attributes button on the ProcessView toolbar and select the first option in the Add/Update Attributes dialog.
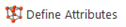
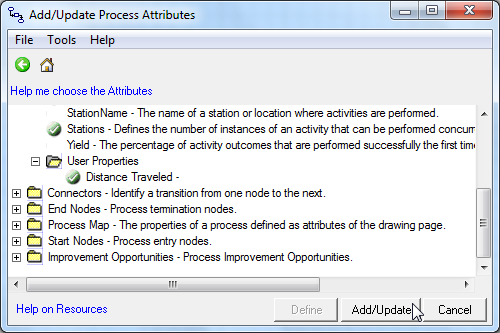
In the Define Attributes window (or Add/Update Attributes window), click the ‘+’ sign next to the Activity Nodes, Start Nodes, or End Nodes section to create a custom user property for the desired shape type. Select the User Properties folder and click the 'User Defined' (or 'Define') button.

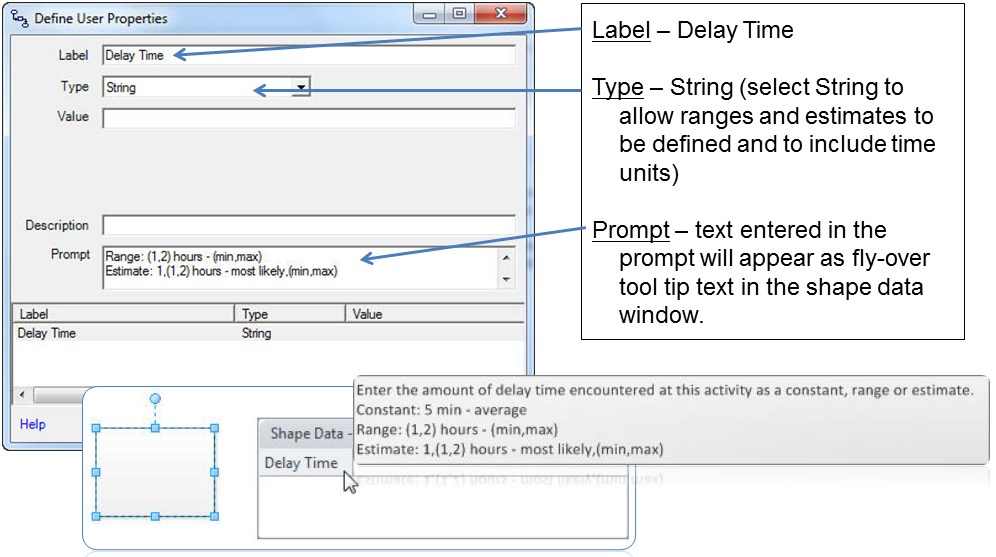
In the define user properties dialog, click the ‘New’ button to add a custom user property to the shape data list.

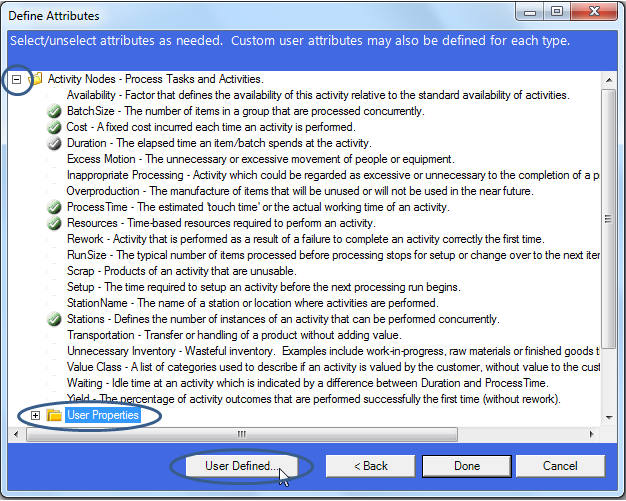
In the Define User Properties dialog, use the ‘Label’ field to describe the user property name as you would like it to appear in the shape data window. Select the ‘Type’ of property that suits your needs. Use the ‘Value’ field to set a default value, if desired, and enter the prompt that will appear as tool tip text in the shape data window.
Note that the ‘Type’ String is used most frequently. This prepares Visio to accept alphanumeric entries in the shape data window, allowing the user to enter ranges, estimates and time units as desired. Also note that use of the Description and Value fields is optional.
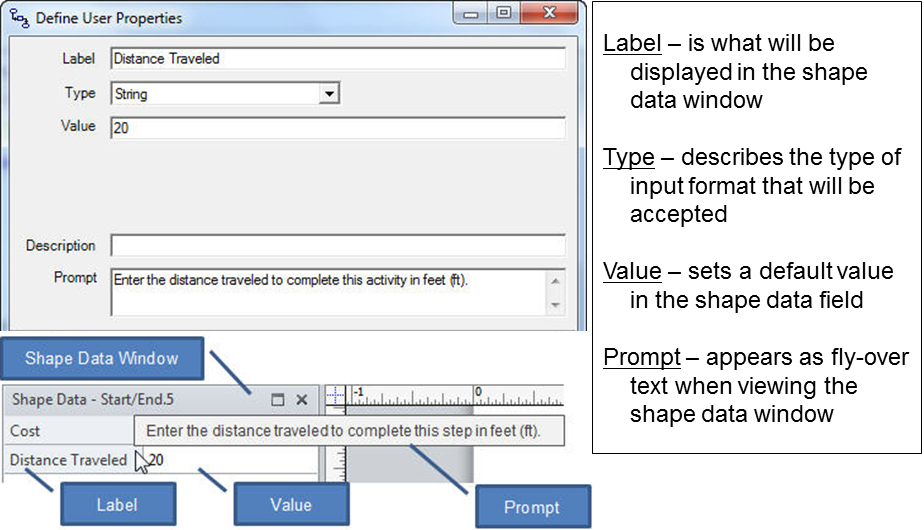
Once the desired custom user property is created, click ‘Ok’ in the Define User Properties dialog.

This will return you to the ProcessView Define Attributes (or Add/Update Attributes) window. Note that the new user property appears under the user properties folder of the selected shape type. Click 'Done' (or ‘Add/Update’) to apply this new property to the shapes in the ProcessView model.
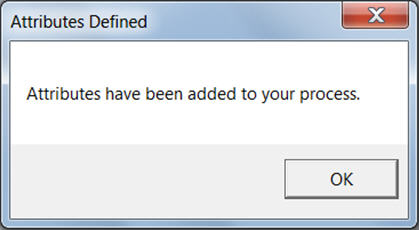
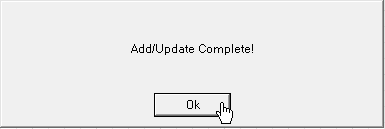
Once the new custom user property has been applied to the shapes, message will be presented to indicate the action is complete. Click ‘OK’ to return to the Visio diagram and begin entering shape data.
Below are several additional examples of how to define custom user properties of various types.
Time-Based
Quantity-Based
 Assigned Cost
Boolean

A video depicting the process for defining custom properties may be accessed in the ProcessView video library.
ProcessView Video Library


